Keeping your Feet Healthy

M28A38661-682x1024.jpg

I remember coming off an alpine day about four years ago andwondering if I would be able to keep climbing due to the pain in my feet. I went to a foot doctor and told him I was having problems but refrained from telling him my profession until he briefed me with the diagnosis. The treatment: wear loose shoes, nothing to tight and make sure to have flexible bottoms. I then told them the problem… “My job requires me to shove my size 43 feet into 40.5 shoes and then stand on small little edges or walk miles to some remote place in shoes that have a very stiff sole as to support the spikes that are on the bottom.” He didn’t know what to tell me other than what doctors typically say which is, “well you will probably have to change professions.”

Needless to say, when I was in Boulder a few weeks later and a friend of mine recommended that I go to Neptune Mountaineering and talk to Bob about my foot problem, I was skeptical but intrigued, so I went. Bob is a super busy guy who has been in the world of making feet comfortable for a long time. He is a pedorthist, which really means he knows about feet and can fix them! Bob will take prints of your feet and then make molds the help with the problems that he can see with your gate. I remember thinking that he is going to a awful lot of trouble, and I am going to feel bad when this doesn’t work. It took him about an hour of tweaking the insoles until he was happy, and I was on my way back to the mountains.

Low and behold, I am calling him six months later to get another pair so that I don’t have to keep switching them between shoes. I just visited Bob a few weeks ago; it has been two years since the first appointment and no toe pain. Yes, I got two more pairs because I totally wore out the old ones. My feet are my job; Bob keeps my feet happy; I keep doing my job!


Check out Boulder Orthotics for happy feet.
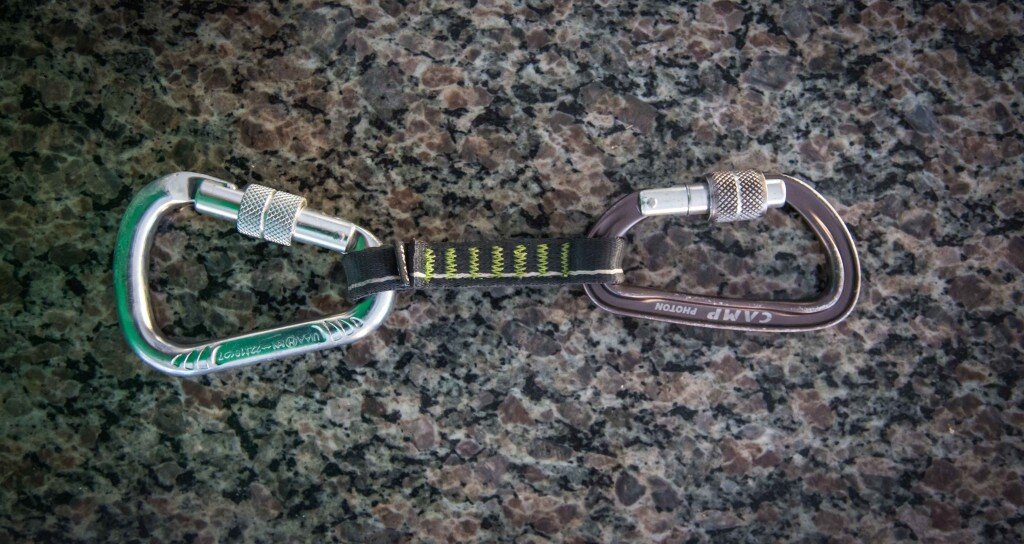
The Locking Quickdraw

The draw is made of a nylon dog-bone with a HMS carabiner on one end and and lighter locking carabiner on the other end.

The draw is made of a nylon dog-bone with a HMS carabiner on one end and and lighter locking carabiner on the other end.

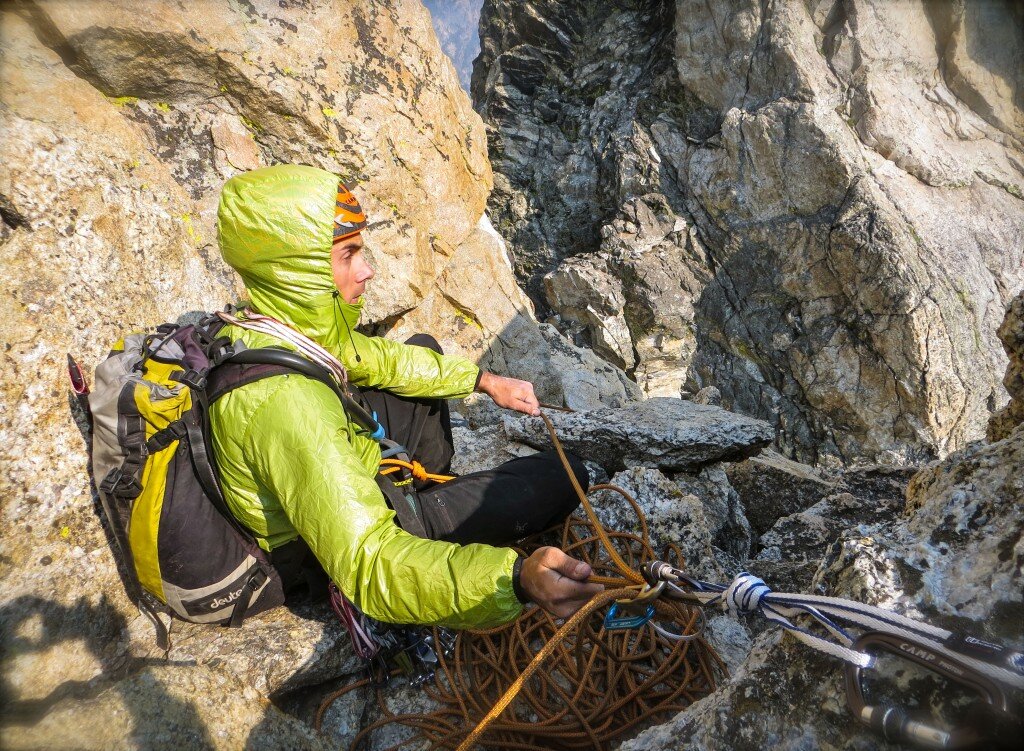
After seeing several guides in the Tetons this summer using a locking quickdraw in various applications, I started testing it out for myself and have made a video showing its utility. I have found it to be not only extremely useful, but also a huge time-saver in several situations. For example, there are times when I prefer to extend the master point of my anchor to achieve some separation between the munter hitch I am belaying from and the clove hitch I am tied in with. Similarly, when I am doing a belayed rappel, I find it useful to have the rappel carabiner on a different master point than the belay biner to prevent the two from binding up against each other. While there are several methods of achieving this, I have found the locking carabiner to be the best in terms of versatility, ease of use, and efficiency.
One important note is that I am using the locking quickdraw in situations where I can either easily monitor it for abrasion or wear since it isn’t truly redundant by itself or where it IS in fact redundant, as it is in the case of using it in a toprope anchor.

Ibex Breakaway Hoodie

IMG_0075-680x906.jpg

As fall approaches, temperatures get cooler, the leaves start to change, and we start to put on more clothing. I have been testing the Ibex Breakaway Hoody all year and it has finally come to the market! I love this piece for climbing as well as hanging out after a long day in the mountains.

I started wearing this jacket during the ice season last year. It is great for ice climbing with its Schoeller® Wool stretch woven fabric and articulated elbows. The jacket also performed well in the Tetons during cool summer nights at high camp and frigid mornings heading up the Grand. The fabric held up well when scraping up  chimneys, and there was very little if any pilling around the harness wear areas. Because the jacket is wool, it doesn’t retain odors, and its machine washability makes it easy to care for.

As the days tend to fade even further and the temps continue to drop, I will add the Indie Hoodie as a base layer and eventually the Wool Aire jacket for my complete layering system. Both jackets are available in both men’s and women’s should be on any climbers wish list for this coming fall and winter seasons!


Repairs

IMG_0002-680x510.jpg

If you spend a lot of time in the mountains (and traveling the country in your truck), you get really good at repairing things on the fly. McNett makes products that have become essential for carrying in the backcountry and have proven equally useful in the “front country.”

I was driving down a backcountry road in my truck the other day, and one of the batteries in my camper busted the hinge to the compartment door that they are stored in. I also have been needing to repair my LaSportiva Gandas as I have put close to 60 mountain days on these great shoes and want to extend their life before getting them resoled. So as I am repairing my shoes with Freesole, I thought to myself, “Wonder if this could work on my truck?”  I have a new compartment door on order, but it would be nice if it was useable in the mean time. So after a bit of shoe repair, I went to work on the door…

IMG_0005-680x510.jpg

Freesole made it work great!

I use medical gloves to keep the stickiness down!


I use medical gloves to keep the stickiness down!

I use medical gloves to keep the stickiness down!

I’ve used some of Gear Aid’s other products like Tenacious TapeSeam Grip, and GORE-TEX patches quite a bit on tents, sleeping pads, pants, and jackets to keep them in good working order. I have even started carrying a small repair kit into the mountains because gear has gotten lighter but not necessarily stronger!

IMG_0014-680x510.jpg
IMG_0008-1024x768.jpg

Deuter Guide 35+ Pack Review and Tips

The Deuter Guide 35+ pack has been a go-everywhere, hold-everything, take-anything-I put-it-through pack. Deuter has been making packs since the 1800’s, and they are built German tough with nothing held back. I have used this pack for everything from guiding winter Sierra summits to putting up first ascents in Armenia to cragging in the Red River Gorge and just got off the Cathedral Traverse in the Tetons with it yesterday. Over 400 days of mountain use later, not a single thing has broken on this pack! The only thing that even had wear was a pull string for the lid, and all that happened there was the sheath wore away.

At 3 lbs 12 oz, the pack isn’t the lightest on the market, just the most durable. Deuter has brought out the Guide Lite series for those wanting ultra-light pack. But again, I have never had a pack that I could put 400 days of use on and have no rips or tears or repairs. The Guide 35+ is made for serious climbers and alpinists who want durability and performance.

Useful features of the Deuter Guide 35+ pack:

-Side zipper to main compartment

-“3 way” removable hip belt

-Gear loops on waist belt

– Made from Deuter-MacroLite 420, Deuter-Duratex-Lite material


Ideal uses for the Deuter Guide 35+ pack:

-Summer alpine rock climbing

-High-end winter alpine climbing where speed and size are an issue

-Cragging

-Getting groceries on your bike


Tips for the Deuter Guide 35+ pack:

-When carrying your climbing rack, put a puffy or something soft in the bottom. This will help the bottom of the pack not abrade so harshly when it rubs against the rocks.

-The hip belt is removable, but you can also just remove the padding. I like this feature when climbing with a harness.

-Once on the climb, I usually stuff my lid inside the pack and use the pull cords to keep the pack closed. This makes the pack smaller and also gives you more room to look up at the next holds.

-While on the climb with the lid stuffed in, I keep things like my wind jacket, water bottle, and food on the side with the zipper. This allows for easy access to the items I will want at hanging belays.

-I can use a lighter harness when climbing with the Guide 35+ because it has gear loops on the waist belt.

-If you leave the top ice axe holder a little loose, you can unclip the bottom buckle and remove the axe without taking the pack off.

-Use the Helmet Holder to hold your helmet secure and provide a little more room in the pack. (I also use this to carry my WAG bags out.)

Deuter Guide 35+ with top tucked in for climbing.

Deuter Guide 35+ with top tucked in for climbing.

Training for Steep Climbing

IMG_8825-2-680x589.jpg

It is hard to stay in shape for climbing in places like the Red River Gorge, New River Gorge, and Rifle, CO, all of which present steep climbing that most of us don’t get to do 4 to 5 days a week, especially when it is hot and humid outside. I have been doing this workout 2 to 3 times per week for my upcoming climbing stint in the Red River Gorge.

In the Climbing Gym–

Warm up:

I do this with an auto-belay and usually on very easy, juggy routes. I climb up as well as down-climb and usually spend about 20 min.

4 x 4s:

You can do these on boulder problems or routes. I have found boulder problems to be more useful for me personally, and I tend to push myself harder.

Pick a route or 4 different routes that you can complete without coming off the wall. These routes should be near your limit at the last set, and you might even fall off. Climb the route and then down-climb any route to get back to the start of your next route. Do this 4 times, shaking out when needed. Then take a 5 min rest between sets.

Repeat 4 times.

Bachar Ladder:

I go up the Bachar Ladder using my feet to move up. Once I hit the next rung, I cut feet and do a right toe raise to the height of the bottom hand and then a left toe raise. I then put one foot on to move one hand up a full bar. You can see this in the video.

Do this 2 times with a 5 min rest in between.

Hangboard:

Start on small holds (no shaking). Hang for 60 seconds.

Move to a jug with one hand, shake with the other. 30 seconds.

Switch hands. 30 seconds.

Back to small holds (no shaking). 60 seconds.

Move to jug with one hand, shake with the other. 30 seconds.

Switch hands. 30 seconds.

Back to small holds (no shaking). 60 seconds.

Rest for 5 min and repeat 3 times.

Cool Down: Probably just walking to the car. Don’t drive until you can hold the steering wheel.

I have also been doing a lot of mountain running and biking to keep my cardio in good shape. You want to do this to both stay lean and be able to keep your heart rate down on those pumpy routes this fall.

Good luck on all your sends!

The Same Playing Field

What would it be like to be in game seven of the World Series, bases loaded, down by 3, full count, Roger Clemens on the mound……and you’re at bat! Many children (and some of us adults) dream of being up against some of the best players in the world just one time, just to know how they would do, what it would feel like.

I played baseball for about 17 years. One of my fondest memories was running out to center field at the same stadium that Ken Griffey, Jr. played in. It was really the closest I ever came to facing the same perils and experiences that Ken Griffey, Jr. faced–not much different than walking down the same street he walked down. Point being, these experiences are untouchable.

Climbing is different. I was in the climbing gym a few days ago when Renan Ozturk walks in and does a little plastic-pulling workout. For those of you who don’t know Renan, he just did the Tooth Traverse, which is a pretty remarkable alpine objective. His climbing partner, Freddie Wilkinson, whom I brush shoulders with all the time in the New England coffee shops, climbed with Uli Steck this spring so Uli could be ready for his race up Everest. So one might say these guys are some of the best in the world, and yet I find myself in this gym training on the same routes that Renan is training on. Huh, pretty cool!

I know you have all seen the Citi Bank commercial with Alex Honnold and Katie Brown on Ancient Art. It is funny to see public reaction to things like this as it is supposedly dangerous, crazy, and untouchable. Climbers all laugh, because many of you have done this climb; you can relate to the uneasy feeling Katie has as she stands on the top of the Gendarme to get her picture taken. Albeit, your picture was probably take from the belay and not a helicopter.

Climbing is one of those adventures people can go on and have experiences that put them with the folks at the top of the game. You can sit back and dream about getting on the Nose of El Capitan and wonder what Lynn Hill might have felt like as she pulled through the changing corners pitch, or you can take a road trip and experience it for yourself.

So while I am still off dreaming of a way to see that fastball or feel what it is like to hold that follow through with #23 on my jersey, the one thing I don’t have to dream of is going into the mountains. We are all on the same playing field out there…..go live your dream!

For some climbing inspiration, check out the Tooth Traverse.


Sizing for Climbing Shoes

“What size climbing shoes should I get?”

“How should my climbing shoes fit?”

“How do you size your approach shoes?”

These are common questions about the sizing and fit of climbing shoes that I hear all the time. I put together a video answering some of these questions. Remember, climbing is supposed to be fun; pain isn’t fun. Buy shoes that fit and feel good, and you WILL climb harder!

The Best Camera to Carry

photo17-1024x497.jpg

Shooting photography has become a passion of mine over the last few years. I have lots of equipment that cost too much money, yet which camera do I always have on me and find myself constantly relying on? My iPhone! So I have delved more and more into shooting and editing with the iPhone. I use various applications to edit, but I still just use the built-in camera for shooting in all cases but one, which I will talk about later.

I’ve learned a couple of useful techniques for shooting photos with an iPhone. First,  the “shutter” takes when you release your finger from the screen, as opposed to when you push the button. Therefore, the most effective way to take a photo is to put your finger on the button, focus on your subject, and then release your finger. Knowing this will give you a photo that is clearer, and you won’t get as much camera shake. Another technique is taking a photo by pushing the “volume up” button. This facilitates taking self-portraits like the one below.

shutter release timer. In that case, I use the app Camera Awesome,which was developed by SmugMug. This app also features a fast shutter that will shoot slow burst or fast burst, albeit at a lower resolution. You can find this app at www.awesomize.com

Here are some other apps that I use to edit:

Camera Plus Pro

PicShop

Color Splash

I always keep my phone protected by my LifeProof case that you can find here:

www.lifeproof.com